DIY beeswax candles are easy to make at home with beeswax, wicks, and containers, and you can simplify the process by using a ready-made kit from Ames Farm.
Candles have been used for centuries to create light, ambiance, and comfort. Today, many people are rediscovering the charm of beeswax candles. Unlike paraffin candles that can release toxins when burned, beeswax candles are all natural, clean burning, and long lasting. They add a warm glow to any space and carry a subtle honey fragrance that feels inviting and pure. Best of all, you do not have to be a professional candle maker to enjoy them. With a few supplies and a bit of time, you can learn how to make your own DIY beeswax candles at home.
In this guide, you will learn what makes beeswax candles special, how to gather the right supplies, and the exact steps to follow to create candles you can enjoy yourself or gift to friends and family.
Why Choose Beeswax Candles
If you are considering making your own candles, beeswax is one of the best choices you can make. There are several reasons why beeswax stands out:
- It burns longer than most other waxes.
- It produces very little soot when the wick is trimmed correctly.
- The natural honey scent means you do not need to add artificial fragrance.
- It creates a bright flame that looks very similar to natural sunlight.
These benefits are part of why beeswax candles are often considered premium, but when you make them yourself, they become more affordable and fully customizable.
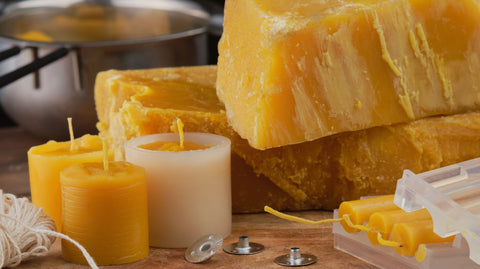
Supplies You Will Need
Before starting your project, gather the right materials. Having everything ready will make the process smooth and enjoyable.
- Beeswax in pellet form or blocks
- Candle wicks (cotton or hemp, pre-waxed preferred)
- Candle containers or silicone molds
- Double boiler or a pot with a heat-safe bowl on top
- Wooden sticks, pencils, or wick holders
- Optional: essential oils for fragrance
- Optional: natural candle dyes for color
If you are new to candle making, starting with pellets instead of blocks is easier because they melt more quickly and evenly. Containers such as mason jars, heat-safe glass cups, or tins are simple to work with, and silicone molds are a fun option if you want to experiment with shapes.
Step-by-Step Guide to Making Beeswax Candles
Step 1: Prepare Your Workspace
Candle making can be messy. Beeswax is sticky, and once it hardens, it can be tough to clean. Cover your table with newspaper or parchment paper, and have all tools within reach before you start heating the wax. Make sure the room is well ventilated.
Step 2: Melt the Beeswax
Place your beeswax pellets or chopped blocks into a heat-safe bowl or pot that sits on top of a saucepan filled with simmering water. This creates a double boiler effect. Stir the wax occasionally as it melts. Never melt beeswax directly on a stovetop because it can scorch or become a fire hazard. Be patient, as it takes a little time for the wax to fully liquefy.
Step 3: Prepare the Wicks
While the wax melts, get your containers or molds ready. Attach the wick to the bottom of each container using a small dab of melted wax or a wick sticker. Position the wick upright and centered. To keep it straight, you can rest a pencil, skewer, or wick holder across the top of the container and clip the wick in place. This step is important because a crooked wick will cause the candle to burn unevenly.
Step 4: Add Fragrance or Color (Optional)
Beeswax naturally has a delicate honey-like scent, but you can add essential oils if you want a stronger fragrance. A few drops of lavender, citrus, or eucalyptus oil can change the atmosphere of your candle. If you want to add color, stir in a small amount of candle dye until the wax reaches your desired shade. Remember that beeswax is naturally golden, so colors may appear softer than if you were using clear wax.
Step 5: Pour the Wax
Once fully melted, carefully pour the beeswax into your prepared containers or molds. Leave a little space at the top so the wax does not overflow. Make sure your wick remains centered and upright as the wax cools. Beeswax hardens relatively quickly, so work steadily but carefully.
Step 6: Cool and Trim
Allow the candles to cool undisturbed for several hours. For the best results, let them sit overnight. Once they are fully solid, trim the wick to about a quarter inch. This length is ideal for creating a bright flame without excessive smoke.
Creative Variations
One of the best things about DIY beeswax candles is how versatile they can be. Once you master the basics, you can experiment with different styles and designs.
-
Rolled beeswax candles: Using beeswax sheets, roll them tightly around a wick for a no-melt, easy method.
-
Decorative molds: Choose molds in shapes like hearts, flowers, or stars for seasonal or gift-ready candles.
-
Layered candles: Pour wax in stages with different colors to create stripes or layers.
-
Blended scents: Combine oils such as lavender and vanilla, or citrus and mint, for unique fragrances.
These variations make candle making a creative hobby that you can continue exploring over time.
Tips for Success
Making beeswax candles is simple, but a few extra tips can help you get the best results every time:
- Keep wicks centered to prevent tunneling.
- Do not add too much essential oil, as it can affect how well the candle burns.
- Use larger wicks for wide containers so the wax melts evenly.
- Store candles in a cool, dry place to avoid the white film that sometimes forms on beeswax (called blooming).
- Test burn one candle before making a large batch to check that the wick size is correct.
Safety Guidelines
- Candles are beautiful but require caution. Always follow basic safety rules:
- Never leave a burning candle unattended.
- Keep candles out of reach of children and pets.
- Place candles on heat-resistant surfaces away from drafts.
- Trim the wick before each use to prevent high flames or smoking.
- Do not burn candles all the way down to the bottom of the container.
By being mindful of safety, you can enjoy your handmade candles with peace of mind.
Final Thoughts about DIY Beeswax Candles
Beeswax candles combine the natural beauty of honeybees’ work with your own creativity. With just a few supplies, you can learn how to melt, pour, and shape candles that provide long-lasting light and subtle fragrance. Along the way, you can experiment with colors, scents, and designs to create candles that reflect your personal style.
If you are looking for a rewarding craft that results in something useful, DIY beeswax candles are the perfect choice. Whether you plan to enjoy them at home, give them as gifts, or even start selling them at local markets, the process is simple and the outcome is always satisfying.
You can skip the DIY process and enjoy the natural beauty of Ames Farm’s handcrafted beeswax candles, made with pure beeswax from their hives. Their candles are long-burning, lightly honey-scented, and a simple way to bring warmth and sustainability into your home.
Frequently Asked Questions About DIY Beeswax Candles
Do I need to add fragrance to beeswax candles?
Not necessarily. Beeswax has a subtle natural scent on its own, but you can add essential oils if you prefer a stronger aroma.
Can I color beeswax candles?
Yes, but keep in mind that beeswax has a golden hue that may soften or alter the appearance of added dyes. Natural candle dyes work best.
How long should I let beeswax candles cure before burning?
You can burn them once they are fully cooled, usually after several hours, but letting them sit for 24 hours helps the wax harden completely.